In This Article...
Picture this: It’s 3:30pm and your Mom-0-Meter is at zero.
You are exhausted but there are another two hours to fill before Distraction Exhibit A: Dad walks through the door.
- You’ve read books.
- You’ve played Thomas or My Little Ponies.
- You’ve rocked, sang, and boogied.
- You’ve even turned the TV on once or twice. (We’ve all done it.)
Good heavens! You’re out of trump cards!
You know what you need right about now? Distraction Exhibit B: Craft Time. Don’t worry! This is a special craft time. A craft time that requires minimum Mom involvement!
Something that keeps him happy and distracted while you feed baby sister, get started on dinner, or just stare out the window, gathering up your energy for the last parenting push of the evening.
It is at this time when I fly into your living room with a hearty ha-HA!, in spandex and a mask, and hand over these sixteen fall crafts for toddlers that he can do (mostly) without you! *high five, jumping out the window* Who was that Masked Mother?! We may never know…
I say “MOSTLY” alone because you aren’t completely off the hook. You will have to gather up a few supplies and possibly cut out a few things that are too difficult for those little hands. The majority of the craft, though, can be completed by your toddler, with just your visual supervision! Be sure to click on the links below each picture for additional instructions and photos.
Fall Crafts for Toddlers:
Learning About Leaves
Kids are like sticky fall fly traps. You will hike a few feet, only to look back and notice they are clutching 14 leaves, there’s a feather behind their ear, and a trail of acorns are spilling out of their little pockets.
They are little feral hoarders.
Well, since you’re going to come home with the woods’ leftovers anyway, why not put them to good use with some paper, glue, and crayons?

Idea from First Palette
Fall Toddler Crafts #1: Leaf Rubbing Collage
This is a REALLY hard craft. So difficult, in fact, that your toddler will have to tell YOU how to make it. 🙂
You’ll need…
- Leaves from your backyard (or last woodland adventure)
- A piece of paper.
- Crayons, with the paper removed.
This is very easily folded up and mailed over to out-of-state Grandma! *hint, hint*
Idea from Artful Parent
Fall Toddler Crafts #2: Sun Catchers
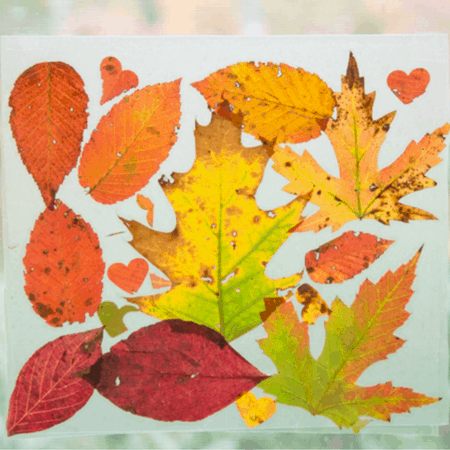
Leaves are nature’s sun-catchers. Why not demonstrate their innate abilities by putting them together in a fun collage you can hang up on your child’s bedroom window to greet him in the morning?
You’ll need…
- Transparent contact paper
- A lotta leaves
- Large heart- or star-shaped hole punch (not really necessary, but still fun!)
All you have to do is cut out the contact paper, let your toddler cut out shapes with the leave (or stick them anywhere, really), and then you cover the top with another piece of contact paper when he’s done. Then tape to the window. Easy peasy, gotta-love-squeezes.
Idea from Craft Club
Fall Toddler Crafts #3: Coffee Filter Leaves
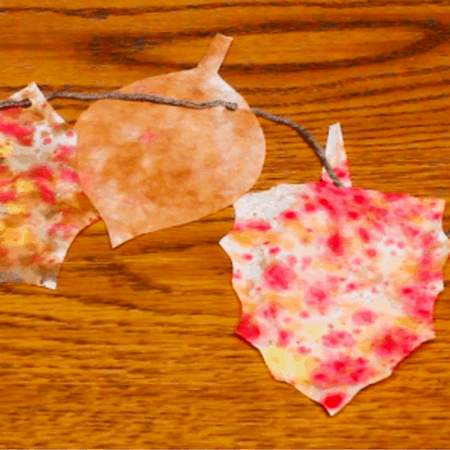
This craft does require some painting, so break out your trusty craft tablecloth.
*record scratch*
You have a craft tablecloth, right? No?! STOP EVERYTHING! Do not attempt to move forward with these fall crafts for toddlers until this $5 investment arrives! Oh, and while you’re at it, I really recommend these toddler crafting smocks. They were a huge blessing for my messy kids, helping me avoid a lot of permanently stained outfits!
You’ll need…
- White coffee filters
- A watercolor set (or try these less-mess watercolor gel-markers)
- Toddler-safe scissors
- A hole-punch
- String, to hang up as a garland
Just have your toddler sit at the table and start painting or polka-dotting the filters. Then draw the leaf shapes out with a marker and let him practice his fine motor skills cutting them out. All that’s left is to punch out some holes and string them up!
Idea from Messy Little Monster
Fall Toddler Crafts #4: Leaf Man Puppets
This fall toddler craft is the most “involved” of the leaf crafts, but since this is something your toddler will want to play with for the next hour, it’s definitely worth a little up-front time-investment!
You’ll need…
- Your toddler’s leaf collection
- Chalk pens (Yes, these exist and they’re awesomely dust-free)
- Colored craft sticks
- Googly eyes
- A cheap laminator (Otherwise the leaves crumble around the same time as your toddler’s self-control)
- Laminating sheets
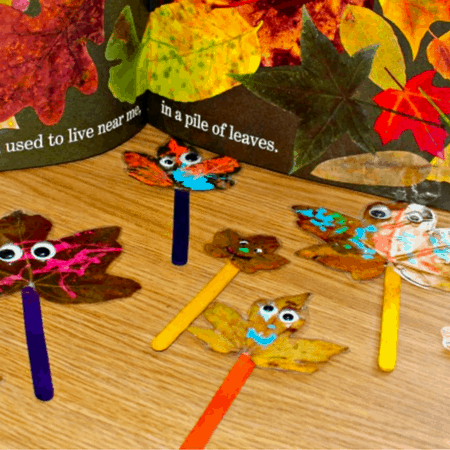
The directions are pretty self explanatory. Let your kids paint all over the leaves, then laminate them, and glue on the eyes and the stick. Then sit back and let them pretend-play their way through a brain boost.
Obviously, you’ll have to help with the laminating part, but that takes just a few minutes. (And speaking of laminators, they are also very helpful for laminating toddler chore charts, snack lists, and zillions of other spur-of-the-moment ideas. I’m constantly surprised at how often I used mine.)
Fall Crafts for Toddlers:
Exploring Pinecones
Next time you’re going to go hiking with your toddler, check ahead to see if you are allowed to collect pinecones along the way. (In many cases it’s illegal to take anything away (other than trash) from a nature preserve.)
If you’re NOT allowed, don’t sweat it, ask your neighbor if you can pick up the pinecones in their yard. My dad would PAY YOU to pick up the pinecones in his yard…he is constantly complaining about them. (So you can get paid for picking up the pinecones…and then sell these bird feeders at a fall lemonade stand! Business opportunities are everywhere!)
Idea from My Kids Adventures
Fall Toddler Crafts #5: Pine Cone Bird Feeders
I can still remember my 2-year-old Elena screaming with delight (and totally freaking me out), because a robin had perched on a branch outside the dining room window. It’s amazing, isn’t it, how things we take for granted are HUGE for our little ones? This fall toddler craft lets her explore nature while eating her afternoon snack.
You’ll need…
- Your toddler’s pinecone collection (or these, in a pinch)
- Peanut butter (or allergy-happy Crisco)
- Birdseed
- String and Scissors (to cut the string)
- Gardening toddler gloves (optional, but can help with any sharp edges!)
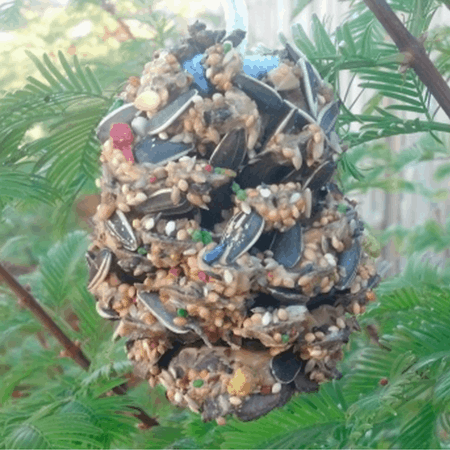
The only thing you have to do is tie the string to the top of the pinecone and put out plates of peanut butter and birdseed. Let your toddler “paint” the pinecone with peanut butter and roll it in birdseed. Then head outside to hang it up!
Idea from No Time for Flash Cards
Fall Toddler Crafts #6: Painting with Pine Cones
Don’t let the words “painting” and “toddlers” make you apprehensive! This can be a very simple craft to set up (and clean up!). Just make sure you have your trusty $5 craft table cover and a good painting smock!
You’ll need…
- The Amazon box your smock and table cover came in. *wink*
- Pinecones (either from your back yard or UPS.)
- Washable paint
- A piece of white paper (for the bottom of the box)
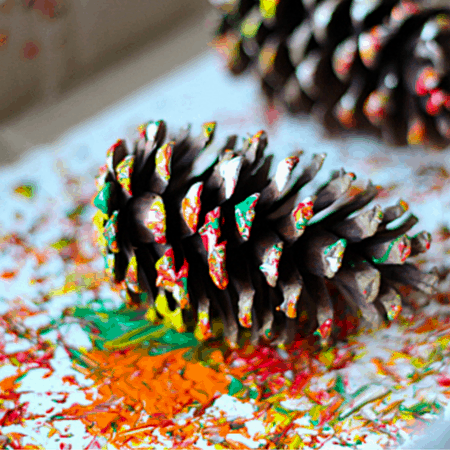
Here goes the beautiful part. Squirt some of the paint on the paper at the bottom of the box. Toss in 2-3 pinecones and let your toddler roll them around until they are appropriately “pretty”. Then set them up to dry. Easy! (And a great opportunity to teach about colors!)
Idea from Becky Shattuck
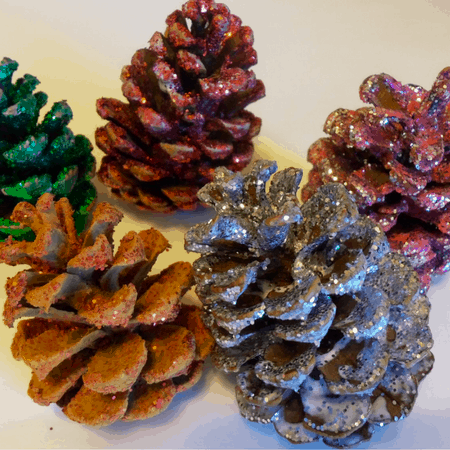
Fall Toddler Crafts #7: Blinged-Out Pine Cones
Firstly, I would recommend doing this craft outside on the back porch. Otherwise, you’ll be vacuuming up “bling” until Easter. Also, smocks. Dear Lord, don’t forget the smocks.
You’ll need…
- Pinecones (obviously…either from your Nature Walk, if permitted, or hand-delivered.
- Children’s glue (or Mod Podge) in a disposable bowl
- A paintbrush
- Plastic Ziploc gallon-sized bags
- A glitter sample pack
Let your toddler have a blast painting the pinecones with glue or Mod Podge, which comes with craft brushes and is easier to spread. (Do you see know why I recommended this as an outdoor craft?) Then let him pick his glitter color and pour it into one of the Ziploc bags to shake to his heart’s content. Set them out to dry and…BOOM. Craft done.
Fall Crafts for Toddlers:
Experimenting with Apples
You know the old saying? An apple craft a day keeps the whines away…
No? Well, I recommend testing it out.
Idea from Thrifty Scissors
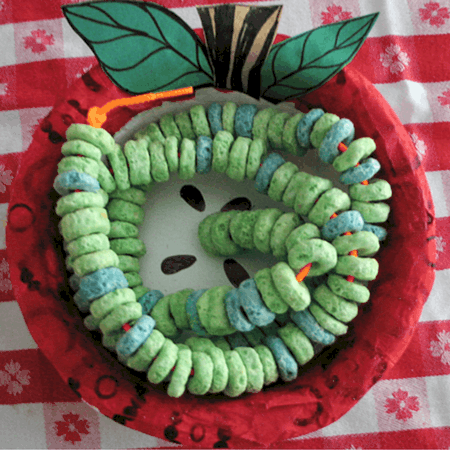
Fall Toddler Crafts #8: Wormy Apple
There’s something about this little craft that just screams READ ME THE HUNGRY CATERPILLAR, don’t you think? (Even though technically this is a worm, all the colors shout Eric Carle to me.)
You’ll need…
- Strong paper bowls
- Red tissue paper
- Green and brown construction paper (if you want to give your apple a stem and leaves)
- Black marker
- String
- A box of Kellogg’s Fruit Loops (Technically it should be FROOT Loops, but I just can’t. #SpellingEthics)
- Early Learners Washable Glue Pen
- Scissors
You’ll obviously have to do a little leg-work up front to get your toddler started first. That means you’ll need to…
- Cut out the leaves/stem
- Draw on the “seeds”
- Poke a hole in the middle and tie a knot in the string so it won’t slip through the paper plate.
Then all you have to do is hand over the washable glue pen, show your toddler where to clue on the paper and string up the Fruit Loops!
Idea from No Time for Flash Cards
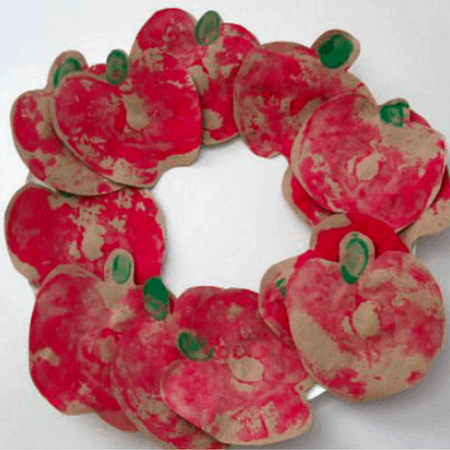
Fall Toddler Crafts #9: Apple Wreath
Can’t you just see this wreath on your front door? It’s absolutely precious! Good enough to eat. (At least, that’s what the baby said…)
You’ll need:
- An apple
- Red and green washable paint
- Two paper plates – one with a hole cut out of the center (like a wreath), one for the paint
- Craft paper to tape to your table, on top of your $5 craft tablecloth.
- String (for hanging)
Before “craft time” begins, use painter’s tape to secure the craft paper to the table and cut the apple in half. Your toddler will use the apple as his “stamp” and stamp all over the craft paper, using his thumb to “stamp” the stem at the top of the apple.
Let it dry for 30 minutes, and then hand over a pair of toddler scissors for him to practice his fine motor skills and start cutting out his stamps! Then glue them onto the wreath, let it dry again, and hang it up!
Idea from Crafty Morning
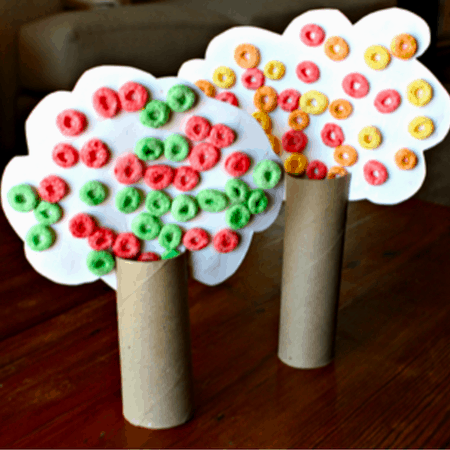
Fall Toddler Crafts #10: Apple Trees
You know that box of Fruit Loops you bought for the Wormy Apple craft earlier? Well, time to use it again! (Because I’m sure it’s still lying around, uneaten, right? HAHAHAHAHA)
You’ll need…
- Kellogg’s Fruit Loops
- Empty toilet paper rolls
- Heather’s favorite washable toddler glue pen (It’s a lot easier for little hands to squeeze on their own. Don’t worry, it dries clear!)
- White cardstock paper
Start with letting your child sort out the Fruit Loops into the colors he wants to use. (You could skip this step…but why not stretch this whole craft thing out as long as possible, right?)
Cut out a blob-shape for the “leaves” for his tree. (You can see if he can do it…but the heavy cardstock can be difficult to cut. You may end up with more of an evergreen tree…)
Then let him easily squeeze his glue pen and start gluing on the “apples.” Once it’s dry, cut two slits across from each other in the toilet paper roll and let him set up his “forest”. (Why not invite the dinosaurs and fairies to come play in the forest as well?)
Idea from About a Mom
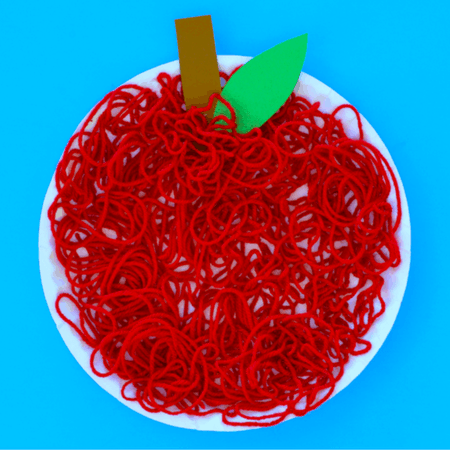
Fall Toddler Crafts #11: Yarn Apple
This is exactly what it looks like: a plate, covered with yarn. Easy peasy, apple squeezy
You’ll need…
- A paper plate
- Lots of red yarn (or red tissue paper, if your toddler prefers to rip paper)
- This washable glue pen again (are you seeing how vital this tool is?)
- Brown and Green construction paper
You can either trace out the leaves and stem and have him cut around your life, or cut those out ahead of time. Let your tiny tot cut out lots of pieces of string, or cut up tissue paper (if that’s easiest) and then glue them all over the plate.
Yes, this is messy, but you’ve thought ahead and have your trusty $5 tablecloth and smock, right? When you’re done, why not give your toddler the chore of “first round sweep” to pick up all the pieces on the floor? He will love being able to use the dustpan and sweeper, and you may just have a little less to clean up when you’re done!
Fall Crafts for Toddlers:
Discovering Pumpkins
Obviously, it would be sacrilegious to do a fall toddler craft and not use pumpkins. I’m pretty sure there’s a rule out there about that. And I always follow the rules. STOP SNICKERING!
Idea from Glued to My Crafts
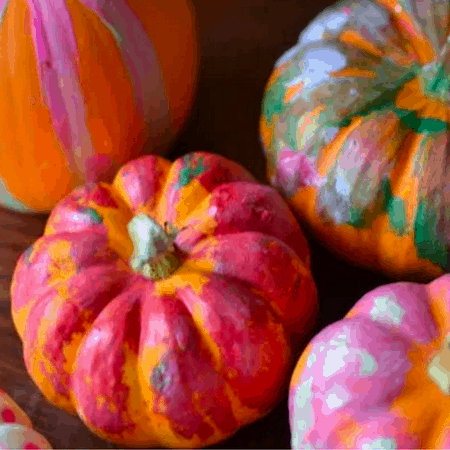
Fall Toddler Crafts #12: Pumpkin Painting
Okay, so this craft is extremely complicated. SO COMPLICATED, in fact, that I seriously debated asking Christi to design a printable for us, with all the steps. Unfortunately, she wasn’t available, so you’re going to have to try to hang with me here.
You’ll need.
- Mini pumpkins (real or these fake ones if you want a keepsake)
- Washable paints in a variety of colors
- A paper plate
- Your usual “let’s not destroy everything” kit: your $5 tablecloth and your handy-dandy toddler smock
I’m sure you’re in a panic right now, not sure where these steps are going, so let me skip the pleasantries and get right to it: You’re going to hand your toddler those pumpkins and he’s going to paint all over them.
Yeah, I like stories with a twist too.
Idea from Crafty Morning
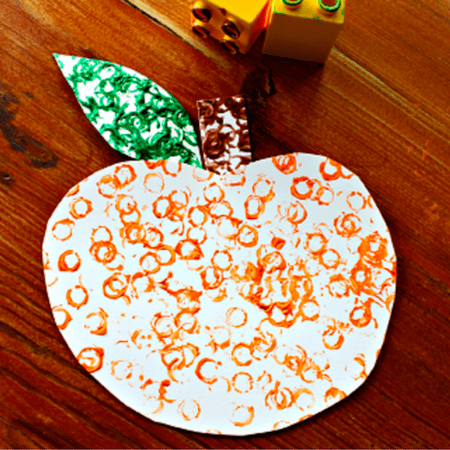
Fall Toddler Crafts #13: Stamped Pumpkin
I know that last craft was a toughie…but I think you’re ready to up the painting game a little bit. In this craft, you’re going to break out those painting supplies, but this time you’ll dig into the toy bin and find some Duplos!
You’ll need…
- Your trusty painting box: (Washable paints, $5 tablecloth, toddler smock)
- White cardstock paper
- Mega-Blocks (Duplo also works, if you already have them)
- Sturdy paper bowls to hold the paint
- Your scissors (This is a “Mom cuts” project. He’ll never get his way through that heavy paper!)
Tape the cardstock in place on the table, and draw a line with a pencil across the top fourth of the paper, and then on that top fourth, draw line halfway across. Then instruct your child to dip the blocks into the paint and use them as a stamp.
- Bottom 75% of the paper should be orange stamp.
- Top right box is for the brown stamp.
- Top left box is for the green stamp.
Then let ’em go! When he’s finished, let it sit until dry. Then cut out a pumpkin shape, hopefully the stem and the leaves will be the right color!
BONUS: Most washable paints don’t come with brown, so add another 15 minutes on the “toddler occupied” clock and encourage him to mix a few colors together and see if he can’t “discover” a good brown to use.
Idea from One Little Project
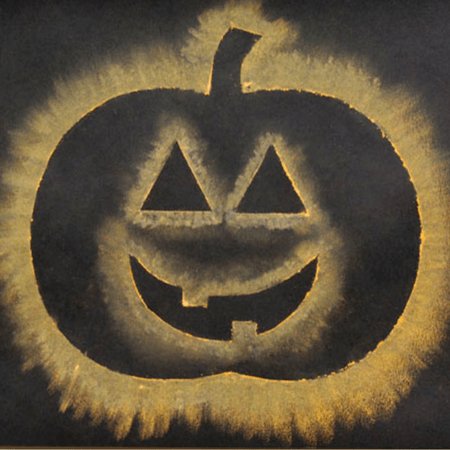
Fall Toddler Crafts #14: Chalk Stenciled Pumpkins
This is NOT a good craft choice if you’re pregnant, or tired, or really REALLY don’t want to have to help out, because it will require a tad more mom-effort than the other ones I’ve added here. (But it was such a cute idea, I really couldn’t leave it off…)
You’ll need…
- Black construction paper (or cardstock)
- Washable orange chalk
- Cotton balls
- Double-sided tape
- Your scissors (or craft knife)
- The pumpkin printable at One Little Project.
Before he sits down to craft heaven, go ahead and cut out the printable pieces and stick them onto the black paper. Then all he has to do is color all over with the chalk and then rub all over with the cotton ball.
Again, having a toddler smock and a package of disinfectant wipes at the ready is going to be crucial to keep the post-crafting mess to a minimum. In fact...is there any way he can do this on the back porch, while you’re cooking and watching from the kitchen? (Just sayin’…)
Idea from Kids Play and Create
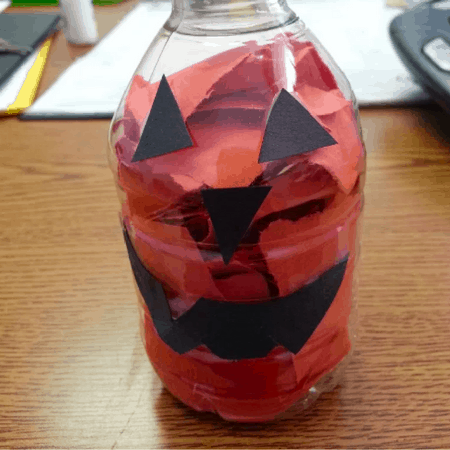
Fall Toddler Crafts #15: Water Bottle Pumpkins
Got some extra trash laying around? Turn it into art! (Then give it to Grandma and Grandpa to hold on to… *evil laugh*)
- Empty water bottles or 2-liters…pretty much anything that’s clear.
- Orange and black construction paper
- The ultimate washable glue pen every home should have in stock because it makes toddler craft time so much easier
All you have to do to set up for this fall toddler craft is to cut out the eyes and mouth. Then let him cut up the orange construction paper to his heart’s content and stuff it into the plastic bottle. (You could also have him just rip the paper, if he’s struggling with the safety scissors.)
Then let him glue the eyes and mouth on. Ta da! Done!
Fall Crafts for Toddlers:
Speaking with Scarecrows
You know how Pennywise the Clown (from Stephen King’s IT) single-handedly destroyed the clown-industry? Yeah, well, that’s what the Scarecrow in the Dark Knight Rises did that for me in regards to the scarecrow industry. (I’m sure that industry exists…)
So, it is with much bravery, that I decided to include ONE scarecrow craft in this list, because it’s such a standard “fall” item. (That, and the Scarecrow from Wizard of Oz threatened to take my heart…that might have been a dream. I’m not taking any chances.)
Idea from Dollar Store Mom
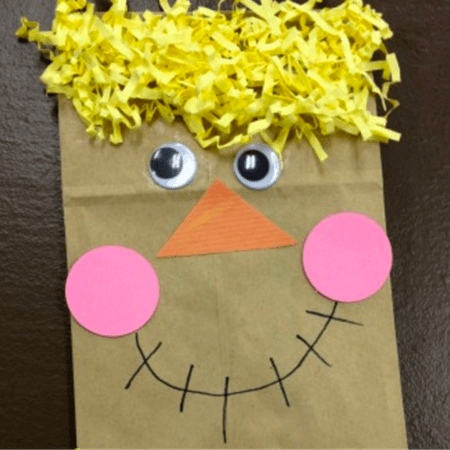
Fall Toddler Crafts #16: Scarecrow Puppet
*trying not to notice that sinister grin*
You’l need…
- Dad’s extra paper lunch bags
- Googly eyes
- Yellow crinkly paper for hair (or yellow yarn)
- The washable glue pen that I keep pushing because it’s awesome (you’ll thank me later)
- A black marker
- Construction paper with shapes cut out for the cheeks and nose
Put all this together and what do you get? An evil creature bent on world domination? *hyperventilating in an extra paper bag*
No, Heather. A playful puppet. Righhhhhhhht
Two Weeks of Afternoon Distractions.
You’re Welcome.
Phew! We made it! (Even past that evil scarecrow!)
You now have 16 days of fun and easy fall crafts for toddlers that will keep her happily occupied while you are watching from the next room.
Want to know something sneaky? Not only are these crafts engaging his brain, they are also helping him master the fundamental fine motor skills he needs to start writing! Yeah, that’s right! You slipped some education in there! You go, girlfriend! You sneaky dawg, you!
Have You Read These Yet?
We ♥ honesty! This post contains affiliate links that provide extra money for our mutual coffee habits addictions. Click here to learn more. As an Amazon Associate I earn from qualifying purchases.
