Do you remember the first time you held a snow globe?
One shake, and suddenly your eyes were glued to the swirling, whirling, glittery flakes as they draped the mystical scene below. You were entranced! You longed for all the enchantment of that wonderland.
Well, Mama, what if I told you you didn’t have to wait until winter to experience that charm? Fall has its own magic! And you and your little one can share it.
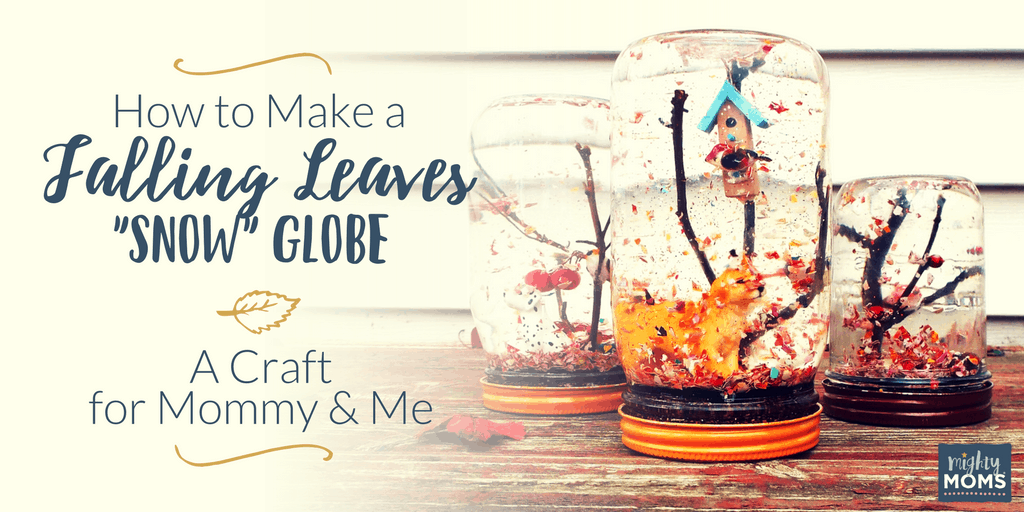
She’s already reveling in these chilly days, begging you for a GIANT pile of leaves to jump in. So together, the two of you can capture the joy of those leaf piles as well as a big heap of that snow globe wonderment by bottling it up in your own Falling Leaves “Snow” Globe.
Believe me, Mama, you’ll treasure this craft for many autumns to come!
Now, before you get started, a note about this craft that will set your mind at ease:
This project is NOT meant to be finished in one day. Enjoy taking small steps and spread the parts out over multiple afternoons if you need to. (Yee Haw! That means you’re covered for autumn activities for several days! *High Five!*)
Collect Your Materials
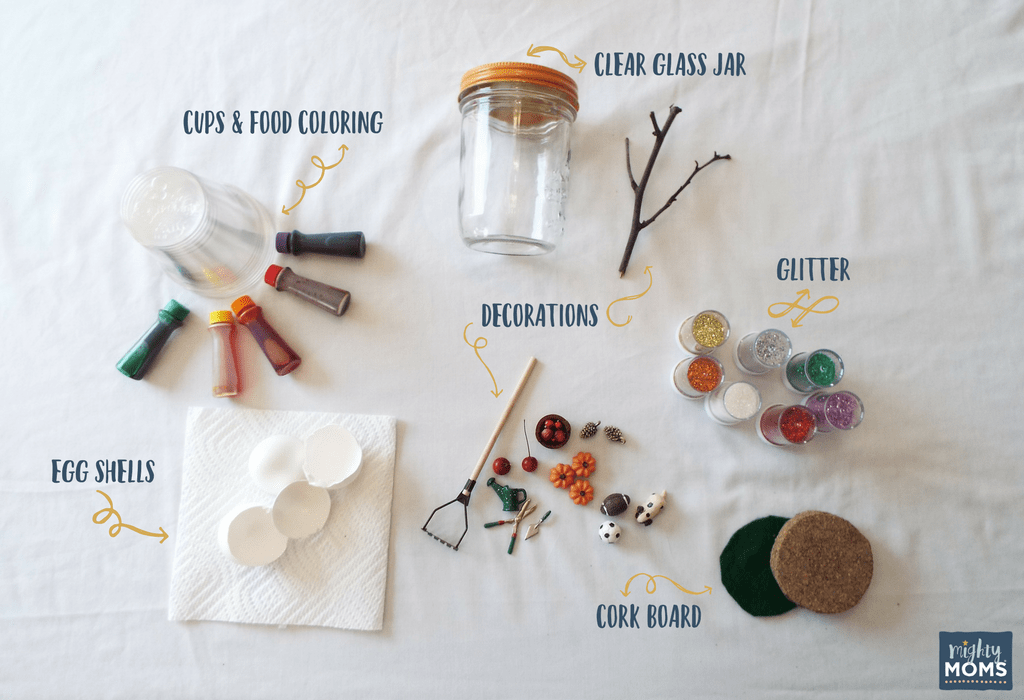
Obviously we can’t create anything without gathering our ingredients together! Here are the items you’ll want to start collecting.
Your Basic Supplies:
- 1 to 3 Eggs (depending on the size of your jar).
- Small baggie to crush egg shells in (optional, but easier clean up, so is it really optional? hmmm…)
- Food coloring—autumn colors
- Vinegar (1Tbsp per food coloring color)
- Hot Water (¼ cup per food coloring color)
- Cups (1 per color)
- Strainer
- Clear Glass Jar with a WIDE mouth opening and TIGHT-sealing lid
- Funnel
- Glitter—autumn colors
- Waterproof glue
- Hot glue gun and glue sticks (optional, but means less “holding” time)
A Liquid to Fill Your Jar (choose one):
- Distilled/Purified Water mixed with a few drops of Glycerin
- Baby Oil
- Mineral oil
Your Decorating Supplies (a few suggestions):
- Large twig with branches, resembling a bare tree—from your backyard bushes or a small tree branch
- Miniature pumpkins or this set with gourds
- Minuscule apples
- Tiny playful squirrels or chipmunks or even hedgehogs
- A cardinal bird bathing or other birds or owls to perch on your branch
- Itty bitty cats on the prowl or a bitsy dog about to pounce
Dye Your Egg Shell “Leaves”
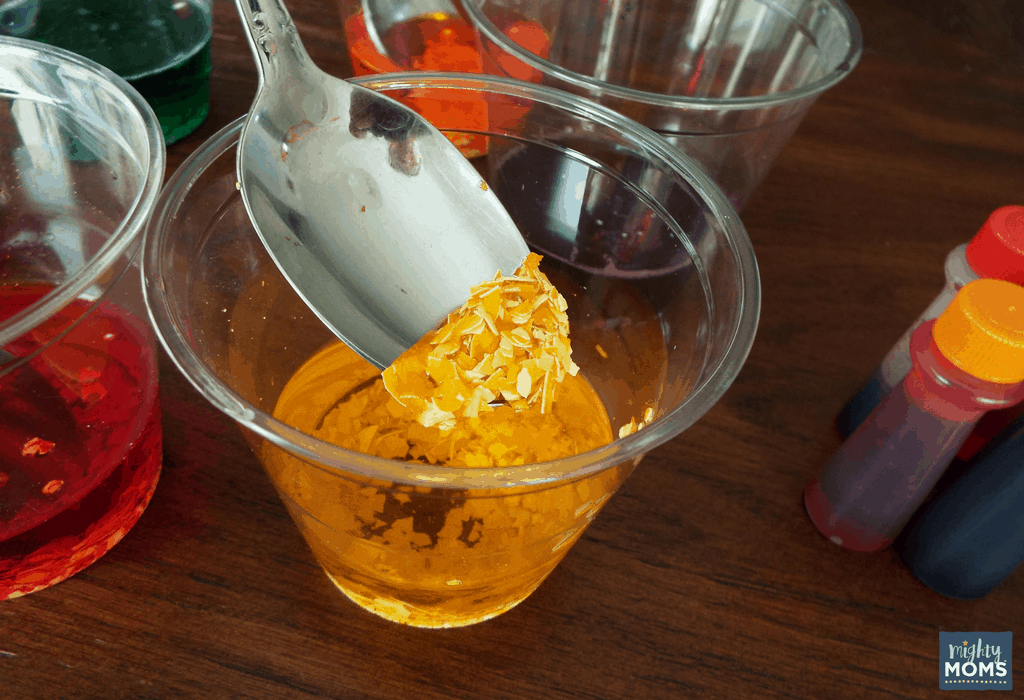
Now that you’ve gathered everything, it’s time to create those leaves, which means coloring eggs–or at least their shells. (Yay! It’s not just for Easter anymore!)
Step #1: Drying the Shells
Crack open one to three fresh eggs. Set the whites and yolks aside and wash the shells until you don’t feel any more stickiness. Set them on a paper towel to dry.
Step #2: Starting a Smash-Fest
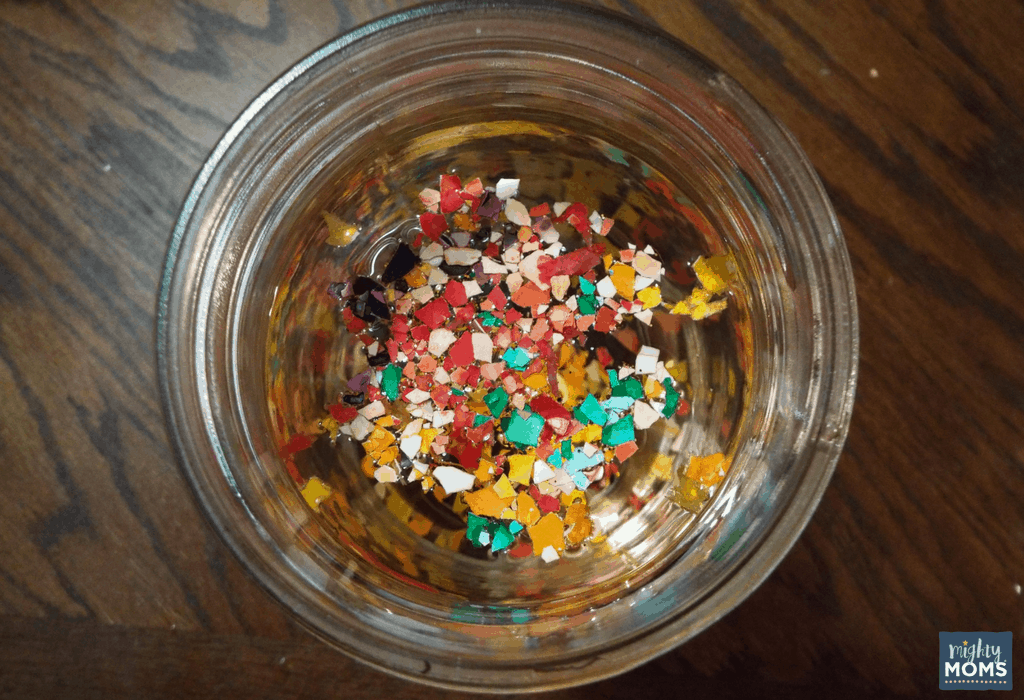
Place the clean, dry egg shells in a quart-size bag and have your pint-sized helper break them into tiny pieces (not powder, but half- and quarter-of-a-fingernail size). This is easiest with a kitchen mallet.
Your child will have a blast smashing them. Finally! Violence that mom will allow!
Step #3: Creating Your Coloring Cups
Prepare your autumn-colored food coloring for dyeing eggs. For each separate cup of color, you’ll need:
- 1 Tbsp vinegar
- ½ cup hot water
- 4-6 drops of food coloring
Step #4: Dying the Shells
Divide the egg shell pieces between your coloring cups and soak them until they’re as dark as you’d like them. I’d suggest doing it longer than a normal Easter egg so your colors are as bright as possible. Aim for 30-45 at the very least, but if you’ve got other things to do, soaking overnight works, too.
In a strainer like this one, drain the egg shell pieces from the dye and rinse them with hot tap water until the water runs clear.
Then let the egg shells dry completely on a paper towel or napkin, being careful to keep your shell-colors in separate piles.
Watching Paint Dry is Boring…Reading with Mom is Fun!
Need something to do while you wait for your egg shells to dry?
This is a great time to read some autumn books together. Your little one—and you—will love the heartwarming Fletcher and the Falling Leaves. (Imagine if you could somehow capture the enchantment of your autumn globe in a picture book—this would be that story!)
And if you haven’t fried up those leftover eggs yolks, why not use them to make Sabrina’s yummy Carrot Zucchini Ninja Muffins?
Or, if you’d rather, you can also start on some of the other steps for your falling leaves globe…
Check Your Glass Jar for Leaks
DON’T SKIP THIS! Believe me, you’ll thank me later!
Fill your clear glass jar with water, tighten the lid as much as possible, and let your tiny tot shake that baby every which way but loose. Go ahead. Get those wiggles out in the kitchen! (Over the hard floors, just in case…)
Any leaks?
Flip the jar upside down and set it on a paper towel for a few minutes. Then set it on its side.
Drips? Drops? There shouldn’t be. You want it DRY!
Heads Up, Mom: Be sure to use glass! Plastic jars can have too much squeeze-ability to be watertight! (And yes, I know that from experience. Ugh! But, hey, at least you get the benefit of my failed experiment. My disaster is your success, so it was all worth it, right?!)
If everything looks tight, dump out the water and dry the lid well.You’re ready for the next step! (It’s the funnest step, too!)
Create Your Magical Scene
Now that you know your jar won’t leak, it’s time to decorate it.
What makes each globe unique? The scene inside, of course. And this is where you and your little darling can let your imagination sparkle. There are so many possibilities, you may find you need to make a bunch of globes!
Let’s start with your first one:
Step #1: Set Your Foundation
The inside of your lid will be your stage, with the jar sitting upside down.
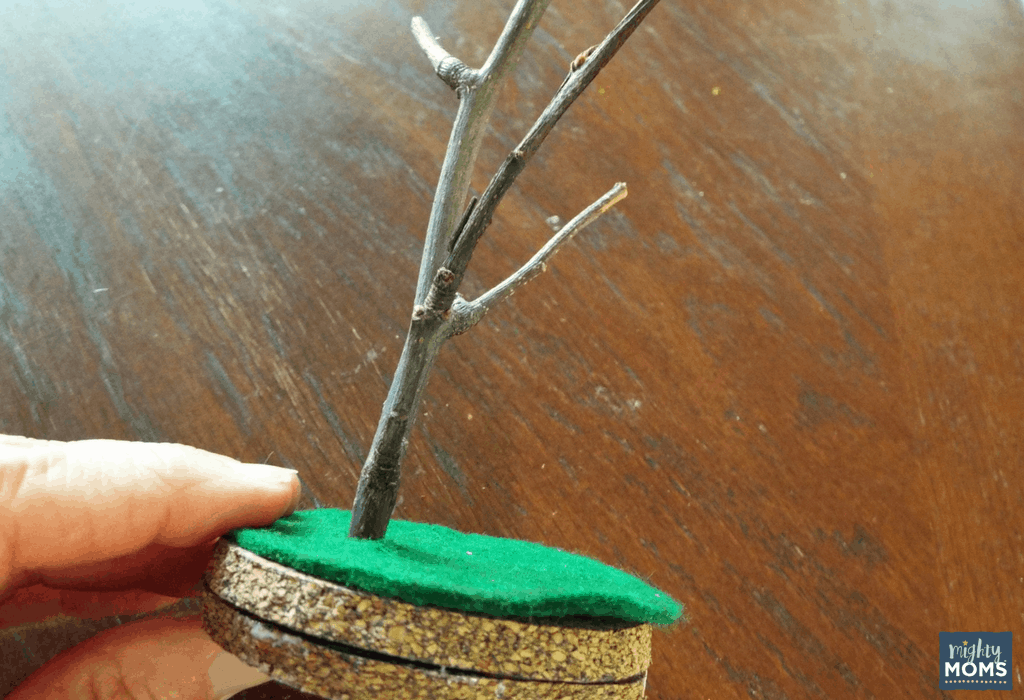
- Cut circles from this cork board to raise your jar’s foundation.
- Layer as many cork board circles as needed to see your decorations over the jar lid’s lip.
- Glue the circles together and to the inside jar lid with waterproof glue.
Now the two of you are ready to add your special “Mommy and Me” CHARM!
Step #2: Prepare Your Tree
Choose a small branch from your backyard, compare it to your glass size, and carefully break off twig ends until your tree can be angled inside, fitting both in height and width.
That cork board that you used to raise your jar’s base? It now becomes the perfect “soil” for your tree. Choose where you want to plant it, and, using a skewer or scissors, make a hole in the cork board to “place” the trunk.
After one last check to make sure you planted the tree deep enough to close the jar, a little waterproof glue in the trunk hole will make sure the tree isn’t going anywhere you don’t want it to.
Step #3: Plan Your Decorations
Now, what will go around or even in your tree? Will this be a re-creation of your backyard? Grandpa’s farm? A city sidewalk? Or maybe just a fall fairy garden? Whatever you decide, you can use small toys from around the house or pick up special trinkets from links below.
Remember, your only limit is being able to fit the scene in the jar—with the lid tightly closed.
Need some possible ideas? Try some of these!
- Mini squirrels or chipmunks. You won’t be able to resist this chipmunk with stuffed cheeks.
- How about a squirrel and hedgehog duo?
- Set up a bird bath or perch these birds in your tree.
- You can’t go wrong with a dog or, better yet, an adorable playful puppy.
- It’s also a great location for a box of apples.
- You could even make your own decorations like miniature pumpkins, acorns, or apples to attach to your tree branches. This sculpey clay is waterproof once you bake it.
Once your magical landscape is completely set the way you and your little artist want it, you’re ready to glue everything securely.
Step #4: Glue Down Your Scene
Since the entire jar will be filled with liquid, you will definitely want to use a waterproof glue.
However, those glues often take several minutes to a half hour to set! (*Gasp*) If your preschooler is anything like mine, that waiting won’t be triggering a happy dance.
Don’t worry! I have a FAST hack for you: the good ol’ hot glue gun.
No, hot glue sticks aren’t actually waterproof themselves, but if you add a little hot glue after the waterproof glue, you won’t have to hold the bird or birdhouse or frisbee onto the tree branch while the heavy duty waterproof stuff turns solid. The hot glue will do it FOR you! (Yes, “Look, Mom, No Hands!” never sounded so good!)
Now, time to take a breath, enjoy a quick autumn apple dessert, and let the glue dry overnight.
Add Your Magical “Water”
Once everything is solidly dry, it’s time to think about what will make those leaves float. You need liquid, but not just any liquid.
Step #1: Choose Your Magic Potion
You could fill it with water, preferably distilled or purified water so impurities don’t cloud your view, but the egg shells tend to sink quickly in straight water.
There’s nothing “magical” about a jar of water with junk settled at the bottom. You need those egg-leaves to float wistfully around your tiny scene!
Here are your options to create that wistful effect:
- Add 4 or 5 drops of glycerin to distilled or purified water.
- Use baby oil, which gives about the same results as the water and glycerin.
- Use mineral oil.
We found that if you want some real “hang time” on those leaves, go with the mineral oil. This thick liquid will make your leaves fall much slower, letting you enjoy some mesmerizing, blustery autumn visions.
Step #2: Add the Right Amount
Now that you’ve got your magic leaf-falling potion created, it’s time to fill up that jar.
BUT WAIT! 5th Grade Science taught us about something called “volume displacement.” Remember? So don’t forget to only fill the jar ¾ full, or you’re going to end up with a slippery liquid mess all over the table and floor!
Hey, you’re almost done!
Step #3: Finishing with Finesse
At this point, you should have several things in front of you:
- Piles of colored egg-shell leaves.
- An upside-down lid with a tree and other tiny items all glued down.
- A jar filled with magic potion.
Now’s the time to sprinkle 1-2 tablespoons of your colored egg shells into your jar of magic potion, adding just a touch of autumn-colored glitter. You won’t need a lot of glitter because too much makes the jar cloudy, but just a hint will make your child’s globe sparkle on the sun-drenched living room shelf!
If you’re like me, at this point, you’re itching to see the finished product! Carefully place the lid and decorations in the jar and screw it on tightly.
Do you see any more space for liquid? The goal now is NO air pockets!
If you see gaps, unscrew the lid and, using a funnel like this one, continue to add mineral oil, checking to make sure the jar is full—without, of course, spilling over.
Enjoy the Magic!
You’ve Made-Your-Own Falling Leaves “Snow” Globe
Now here’s the moment you’ve both been waiting for.
Screw the lid on tightly, flip the jar over, shake it up, and voila!
You’ve created your Autumn-magic-in-a-bottle. Your swirling wonderland is finished and ready for many years of fall fascination.
Now you can sit back, shake your glistening globe, and enjoy your autumn “snow”!
Of course, soon you’ll be dreaming of making another one together because you know Grandma’s going to want one, too!
A Read-Aloud Book to Enjoy Together
What’s this? You’re still reading? Not ready to leave yet?
Well, fine. I’ll keep entertaining *tapdancesolo*
Just in case the image of me tap dancing across with a top hat and cane isn’t doing the trick, here’s a read-aloud rhyming story to watch and enjoy with your little one as you enjoy a yummy snack and glass of milk!
Finished? Now put on your hat and cap and head out there to play in the Autumn Snow! 🙂
Have You Read These Yet?
We ♥ honesty! This post contains affiliate links that provide extra money for our mutual coffee habits addictions. Click here to learn more. As an Amazon Associate I earn from qualifying purchases.

